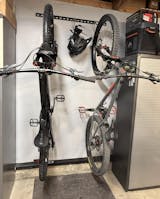
Highly recommend, look great, simple robust design with clear installation instructions
Gearhooks has been a game changer in my garage.
I was always shuffling bikes around the floor area to make room before I installed this hanger.
It’s well thought out and easy to install. Good quality and affordable. Family owned too!
Now 2 bikes are always on the wall and out of my way.
I’ll probably add another one at some point for other tools.
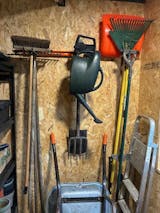
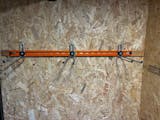
After trawling the internet for a suitable solution to bring some order to storing my garden tools in the garage I decided to go with GearHooks - I liked the website and the look of the products and the mounting instructions were clear and easy to follow. I ordered the Garden Tool Wall rack with 3 Hooks in Orange - having a range of colours to select from is a nice option to have. Post order the communications from GearHooks was excellent, keeping me informed of the status of the order. On delivery I was immediately impressed with the quality of the packaging and the supporting documentation was excellent. It felt to me like a lot of care and pride had gone into every aspect of the product. The rack and supporting bolts, washers and clamps were top quality. I fixed the rack to the garage wall with no hitches. It was simple to do taking no time at all as everything worked first time thanks to the very clear and easy to follow instructions. I am delighted with the result and have now freed up valuable space in the garage. Many Thanks
Second purchase from Gearhooks.
Once again excellent communication and service.
Not in place yet, but will be perfect.
Will definitely recommend them.
Bought two orange bars and the climbing gear hooks for my son’s bedroom. He is using them for storage of his hiking, camping and cycling gear. They look funky and give an industrial feel to his room. Hold lots too. Easy to install and fittings were of really high quality. Might buy more for bike storage in the garage.
We are very happy with this product. It holds the skis well. Is not too big and was easy to install. I would recommend.
I’ve ordered from GearHooks twice now, and both experiences have been absolutely fantastic! The website is incredibly easy to use, orders are processed instantly, and their communication is brilliant every step of the way. Delivery is prompt and reliable, and when I misplaced the invoice, their team sent a replacement without hesitation—so helpful and friendly.
The products themselves are outstanding in quality, and the customer service is truly top‑notch. Overall, GearHooks delivers great products, exceptional service, and a genuinely impressive customer experience. I highly recommend them every time!
Music Department
A really well-crafted product with EXCELLENT instructions for unpacking, assembling and installing. Much of the packaging was recyclable too (and I was reminded about this by a little note in the box). Great service, quickly made and sent (despite inclement, wintry weather). Cannot recommend highly enough.
Been searching for ages and then came across gearhooks. Very well priced, excellent service with it arriving in a few days and brilliant but unfortunately unusual after sales service. Thank you gear hooks
Couldn't be happier with the wall rack which works perfectly for my three bikes and extra gear. The ability to make small adjustments vertically and not just sideways along the horizontal rack has allowed me to keep my bikes tucked away neatly in a corner of the flat, and the orange powder coat makes for a lovely pop of colour. Luis was also highly communicative throughout the ordering process and I received my order quickly and without a hitch. Couldn't recommend GearHooks highly enough!


